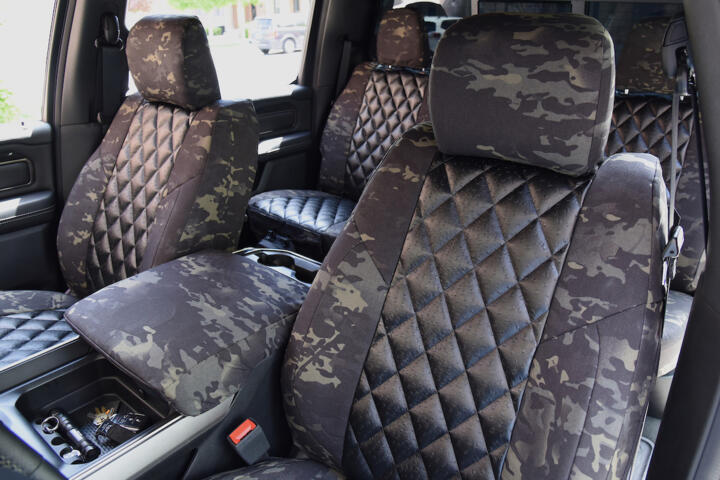
Seat Covers and Comfort
Seat covers change the way a seat feels because they add layers between your body and the upholstery. That layer affects heat buildup, friction, and how water or sweat spreads across the surface. A typical car seat has foam thickness around 50–100 mm, so even a 5–10 mm cover can noticeably change the feel.
Comfort also depends on vehicle type. A compact hatchback with tight rear legroom feels different than a three-row SUV where you sit longer. In many vehicles, front seats include side airbags, and cover fit matters for deployment. The National Highway Traffic Safety Administration has long warned that aftermarket seat covers can interfere with airbag operation if they are not designed for that purpose.
Resale value ties to wear patterns. Buyers often look for consistent upholstery condition, especially on the driver’s seat. If a cover traps moisture, you can end up with odor or staining under the cover, which shows up later when the cover comes off.
Skip the “one size fits all” covers. They add seams where you do not want them.
Seat covers also change cabin noise. Thick, loose covers can rattle over bumps, while well-fitted covers stay quiet. On a road trip, that difference shows up after 2–3 hours, when you notice small noises more than you do on a 15-minute drive.
What Buyers Get Wrong
People often buy covers for looks first, then deal with comfort and fit later. That approach breaks down when the cover changes how you reach the seat controls or how the seat belt lays across your chest. It also breaks down when the cover blocks the seat’s natural contours.
Another mistake is ignoring material behavior. Neoprene-style covers can feel warm in winter and trap heat in summer. Mesh covers can cool better but may not hide stains as well. Vinyl covers resist spills, yet they can get slick and uncomfortable in hot weather.
Consequences show up fast in real use. A parent with a child seat needs stable, non-slip surfaces and enough clearance for the child-seat base. If the cover bunches under the child-seat anchors, the installation can loosen over time. On the driver’s side, a cover that shifts can also change how the seat belt retracts, which becomes obvious during quick stops.
Skip covers that block access to seat controls. They turn minor adjustments into a daily hassle.
Financial consequences matter too. If a cover fails to protect against spills, you may still pay for upholstery cleaning or reconditioning. If it traps moisture, you may need odor removal and, in worst cases, foam replacement. Upholstery work costs vary widely by region, but a typical professional seat cleaning can run from $150 to $400 per seat, and repairs can exceed $1,000 when foam or stitching is involved.
Vehicle choice changes the risk. A 2021–2024 compact SUV with power lumbar and integrated side airbags needs covers engineered for those features. A work truck used for muddy boots and wet gear needs water-shedding materials and easy wipe-down surfaces, or the cover becomes a chore.
Choose Covers that Fit
Start with airbag-safe fit
Pick seat covers that are explicitly designed for your seat’s airbag configuration. Look for documentation that the cover is compatible with side airbags and that it has the correct cutouts. This matters because side airbags deploy through the seat’s outer bolster area, and a poorly placed seam can slow or redirect deployment.
On many vehicles, the driver’s seat belt pretensioner and buckle sensors sit near the seat base. A cover that interferes with those components can create warning lights or complicate service. If you own a 2019 Toyota RAV4 or a 2018 Ford Escape, verify the cover model year range before buying, because seat shapes change between trims.
Skip generic covers. They often miss the exact seam and cutout locations.
In practice, airbag-safe covers look “purpose-built,” with visible openings where the airbag deploys. Installation should take 30–60 minutes, not two hours of wrestling. If the cover requires heavy force to fit the bolster, stop and reassess.
Match material to climate
Choose materials based on temperature and sweat behavior. For hot climates, breathable mesh or perforated fabrics reduce heat buildup. For cold climates, a cover that holds less heat can feel worse, so many owners prefer covers with a warmer surface texture or use seat heaters.
Seat heaters transfer heat through the seat surface. A thick cover can reduce heat transfer, so the heater may take longer to reach a comfortable level. If your vehicle has heated seats, test the cover with the heater on for 10 minutes and check whether the surface warms evenly.
Use a simple test. If the heater feels weak, the cover is too insulating.
In winter, neoprene and vinyl can feel cold at first. In summer, they can feel sticky. A practical compromise is a cover with a breathable top layer and a water-resistant backing that does not trap moisture.
Control thickness for support
Seat comfort depends on foam support, and cover thickness changes that. A cover that adds too much padding can soften the seat and increase fatigue on long drives. For example, a 2–3 hour highway trip in a Honda CR-V often reveals pressure points if the cover compresses unevenly.
Measure the cover’s added thickness if the seller lists it. If not, compare by feel and check whether the seat belt still locks smoothly. A cover that makes the seat belt sit higher or lower can change how it distributes load during braking.
Skip thick foam covers. They can shift your posture over time.
In practice, a good fit keeps the seat’s original contours. You should still feel the seat’s lumbar shape through the cover, especially on vehicles with adjustable lumbar like a Hyundai Tucson.
Plan for cleaning and spills
Cleaning behavior affects both comfort and value. A cover that resists stains keeps the cabin smelling neutral, which matters for resale. For pets or kids, look for covers that wipe clean and do not absorb spills.
Water-resistant covers help with wet gear, but they can trap moisture underneath if you do not dry the seat. If you live in a rainy region, remove the cover after heavy wet use and let the seat air out. That reduces the chance of mildew, which can be hard to remove later.
Skip “waterproof” claims without drainage. Trapped moisture becomes odor.
In practice, vinyl and coated fabrics clean faster than woven materials. Fabric covers can work well if they are machine-washable and you can remove them without disassembling the seat.
Keep child-seat compatibility in mind
Child-seat compatibility is not just about anchors. It is also about how the cover surface behaves under load. When you tighten a child seat, the base should not slide on the cover.
Check whether the cover has openings for ISOFIX/LATCH anchor points or whether it interferes with the seat crease. On many vehicles, rear bench seats in a Subaru Outback or a Kia Telluride have specific anchor locations, and a cover that covers those points can complicate installation.
Skip covers that hide anchor points. They make correct installation harder.
In practice, do a fit check after installing the cover. Push the child-seat base side-to-side and front-to-back; it should not move more than the manufacturer allows. If it does, adjust the cover or choose a different model.
Protect resale with reversible choices
Resale value depends on how easy it is to return the seats to original condition. Covers that leave no residue and do not stain the original upholstery tend to preserve value better. If you plan to sell in 3–5 years, choose covers you can remove cleanly.
Some covers use hooks and straps that can scuff leather or pull at seams. That can create new wear patterns that buyers notice. If your vehicle has leather seats, test the cover on a small area first and inspect for rubbing after a week.
Skip covers that require permanent adhesives. They can leave residue when removed.
In practice, reversible covers with minimal contact points are easier to remove. Keep the original upholstery clean under the cover by vacuuming crumbs and drying damp areas.
Use the right installation method
Installation quality affects comfort, noise, and safety. Covers that are loose can shift, creating wrinkles that press into your back. Covers that are too tight can stretch and tear at seams.
Use the manufacturer’s installation steps and take photos before removal. A small aside: I have seen owners skip the “seat back removal” step on certain vehicles and end up with a cover that never sits flat. On a 2020 Volkswagen Tiguan, that shortcut can leave the side bolster misaligned.
Skip shortcuts during install. Misalignment shows up as rattle later.
After installation, check seat belt operation and heater function. Then do a 10-minute drive over uneven pavement to listen for shifting.
Estimate ownership cost realistically
Seat covers cost less than upholstery repair, but they are not free. Budget for replacement if the cover fades, tears, or loses elasticity. A typical set might last 2–5 years depending on sun exposure and cleaning frequency.
Factor in labor if you pay for installation. Some covers require professional fitting when they must match complex seat shapes. If you use a cover in a fleet setting, you may also track replacement cycles by vehicle.
Skip assuming covers last forever. Sun and friction wear them down.
For value, compare the cost of covers to the cost of cleaning. If you spend $200–$500 on covers and avoid one $200 cleaning job, the math can work out. If the cover causes odor or requires reupholstery later, the savings disappear.
Mini Case Examples
A small delivery company ran 12 vans with cloth seats and frequent wet deliveries. They saw recurring complaints about damp odors after rainy routes, even when they cleaned the seats monthly. They switched to water-resistant covers with breathable tops and added a weekly “cover removal and dry” routine. After 6 months, odor complaints dropped enough that they stopped paying for repeat deodorizing services, saving an estimated $300–$600 per van per year.
Skip the “cover forever” mindset. Moisture management still matters.
A second case involved a couple with a compact SUV and a dog that rode in the rear. They started with a thick padded cover that shifted on the bench and made the seat belt feel slightly off. They replaced it with a fitted, airbag-safe design for the front and a non-slip rear cover with anchor cutouts. After 9 months, they reported fewer wrinkles and less time spent cleaning, and they kept the original upholstery in better condition when they traded the SUV at about 45,000 miles.
Checklist Before Buying
| Check | What to verify | Why it affects comfort | Why it affects value |
|---|---|---|---|
| Airbag cutouts | Side bolster openings match your seat | Prevents pressure points and shifting | Reduces risk of damage during service |
| Heated seat test | Heater warms evenly after 10 min | Avoids weak heat transfer | Prevents you from removing it early |
| Child-seat anchors | LATCH/ISOFIX points remain usable | Base stays stable under load | Avoids seat damage from repeated re-install |
| Moisture behavior | Breathable top, dryable backing | Reduces sticky feel and odor | Prevents mildew under the cover |
| Removal plan | No adhesives, minimal scuff points | Keeps seat feel consistent | Preserves original upholstery condition |
Common Mistakes and Fixes
Buying for looks first happens because seat covers are visible every day. The impact is comfort drift: wrinkles press into your lower back, and loose straps create rattles. Avoid it by doing a fit check with the seat in multiple positions, then driving over a rough road for 10 minutes.
Skip the “install once” assumption. Covers loosen as fabric stretches.
Another mistake is ignoring seat belt routing. People notice it only after the cover shifts, when the belt sits too close to the neck or retracts slowly. Avoid it by checking belt movement immediately after installation and again after the first week.
Some owners trap moisture under water-resistant covers. The impact is odor and potential staining that shows up months later. Avoid it by removing the cover after heavy wet use and letting the seat air out before reinstalling.
Skip covers that hide anchor points. They complicate child-seat installation and can lead to unsafe looseness.
Finally, people underestimate how trim changes affect fit. A cover that fits a 2020 model year may not fit a 2021 trim with different seat contours. Avoid it by matching the exact year range and seat type, then confirming the side bolster shape.
FAQ
Do seat covers reduce heated seat performance?
They can. Heated seats transfer heat through the seat surface, so a thick cover or one with insulating backing may slow warm-up. A practical test is to run the heater on high for 10 minutes and check whether the warmth feels even across the seating area. If the cover feels warm only at the edges, the insulation layer is too thick or poorly aligned. If your vehicle has ventilated seats, some covers also block airflow, which changes the cooling feel.
Will seat covers affect side airbag deployment?
They can if the cover is not designed for your seat’s airbag layout. Side airbags deploy through the seat bolster area, and a cover with incorrect seams or blocked openings can interfere with deployment. Look for covers that state compatibility with side airbags and that have the correct cutouts for your seat. If the cover requires heavy stretching over the bolster, stop and reassess. For safety-critical fit, follow the cover maker’s instructions and verify that the cover does not cover the airbag seam lines.
Are waterproof seat covers safe for cloth seats?
Waterproof or water-resistant covers can protect cloth from spills, but they can also trap moisture if you do not dry the seat underneath. That trapped moisture can lead to odor and staining later. If you use the cover in rainy conditions or with wet pets, remove it periodically and let the seat dry. Choose covers with breathable tops and backing that does not seal in dampness. Also check that the cover does not rub the seat seams, because repeated friction can wear cloth fibers.
Do seat covers hurt resale value?
They can help or hurt, depending on how they protect the original upholstery. Well-fitted covers that are easy to remove and do not leave residue tend to preserve the seat condition. Covers that use adhesives, scuff points, or leave stretched fabric marks can create new wear patterns that buyers notice. If you plan to sell, keep the original upholstery clean under the cover and avoid covers that trap moisture. When you remove the cover, inspect for discoloration, seam pulls, and any lingering odor.
What should I check for child-seat use?
Check anchor access and surface stability. A cover can cover LATCH/ISOFIX points or change the friction between the child-seat base and the seat cushion. After installing the cover, install the child seat and test for movement within the child-seat maker’s allowed range. If the base slides or the cover wrinkles under tightening, choose a cover with anchor cutouts or a non-slip surface. Also confirm that the cover does not interfere with seat belt routing for the child-seat belt path.
Author's Insight
Seat covers act like a thin “second upholstery,” so comfort changes come from heat transfer, friction, and how the cover conforms to foam contours. Fit quality matters more than thickness, because loose covers shift and create pressure points. Moisture behavior is the hidden variable; covers that resist spills can still trap dampness under the surface. For value, reversible installation and minimal scuffing usually matter more than the cover’s brand name.
Skip the assumption that a cover alone prevents wear. Dirt and moisture still reach the seat through seams and edges, so cleaning habits under the cover still drive outcomes.
Key Takeaways
Seat covers can improve comfort by reducing friction and protecting upholstery, but they can also reduce heated-seat performance and create odor if moisture gets trapped. Airbag-safe fit, child-seat compatibility, and material behavior in your climate determine most of the real-world results. For value, choose covers that remove cleanly and do not leave residue or scuff marks.
Next step: match the cover to your exact seat type and year range, then do a 10-minute heater test (if equipped) and a belt-operation check. If you use a child seat, install it after the cover goes on and verify movement stays within the child-seat instructions.
If you notice persistent burning smells, visible mildew, or any airbag warning lights after installation, stop using the cover and have the fit inspected by a qualified installer or dealer service department.