OEM vs Aftermarket Basics
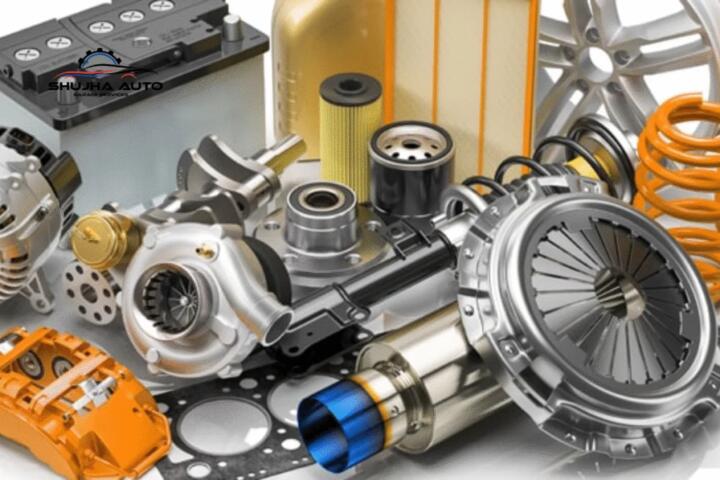
OEM parts are built to match the vehicle manufacturer’s specifications, including dimensions, materials, and software calibration where relevant. Aftermarket parts are produced by other suppliers, sometimes to the same spec and sometimes to a different one. A practical example is a brake pad: OEM and aftermarket pads can both stop the car, but pad compound, noise shims, and wear rate can differ.
Vehicle type changes the stakes. A sensor on a 2.0L turbo engine can trigger a check-engine light if the signal shape or connector pinout differs, even when the part “looks right.” A suspension bushing on a heavy SUV sees higher loads, so material stiffness and compliance matter more than buyers expect.
In the US, many replacement parts are sold through aftermarket channels, and the market share is large enough that insurers and fleets routinely track failure rates by brand and part number. For context, a typical modern car has dozens of sensors; a single mismatch can affect drivability, emissions readiness, or safety systems.
Skip the guesswork. Use the exact part number and vehicle VIN when possible.
Also, warranty coverage differs. OEM parts installed under a manufacturer-backed program may carry a warranty tied to the repair, while aftermarket warranties vary by seller and may exclude wear items or consequential damage. That gap shows up later when you’re paying labor again.
Where Buyers Get Burned
People often treat “aftermarket” as one category. In reality, aftermarket spans low-cost replicas, direct-fit replacements, and premium OE-style components. The risk is that fitment and performance can diverge from the original design, especially for parts that interact with electronics or safety systems.
Consequences show up as repeat repairs, longer downtime, and higher total cost. A cooling fan module that doesn’t match the original thermal control strategy can run longer than expected, raising battery drain on stop-and-go trips. A wrong wheel-speed sensor can cause ABS cycling, traction control intervention, and uneven tire wear.
Real-world example: a fleet manager replacing a 2018–2021 compact crossover’s front control arm bushings with mixed-brand aftermarket parts reported faster squeak complaints after 20,000–30,000 miles. The parts were installed correctly, but the bushing material and surface finish didn’t match the original damping behavior.
Skip the cheapest option. It often turns into two labor bills.
Financially, labor is the multiplier. If a part fails early, you pay diagnosis time and reinstallation time again. Depreciation also matters: a vehicle with repeated warning lights or a documented repair history can lose resale value faster than one with a clean service record.
How to Choose with Specifics
Start with VIN and part numbers
What to do: match the part to your VIN, not just the model year. Why it works: manufacturers revise suppliers, connector pinouts, and hardware revisions mid-run. What it looks like: the same “brake caliper” listing can differ by production date, ABS tone ring design, or rotor thickness. Tools/methods: use the dealer parts catalog by VIN, then cross-check the aftermarket listing by the OEM number. Outcome target: fewer returns due to fitment issues, especially on electronics-heavy parts.
Use the VIN. It catches revision changes.
Separate wear items from safety systems
What to do: treat brakes, steering, and suspension differently from cosmetic trim. Why it works: safety systems depend on predictable friction, sensor signals, and mechanical tolerances. What it looks like: aftermarket brake rotors may have different metallurgy and surface finish, affecting pedal feel and dusting. Tools/methods: check whether the part is engineered for the exact axle and brake package; compare rotor thickness specs and pad backing plate design. Outcome target: stable braking over repeated stops without premature vibration.
Brake parts need axle match. Sensors need signal match.
Verify sensor compatibility and calibration
What to do: confirm connector type, mounting style, and signal range for sensors. Why it works: a mass airflow sensor or oxygen sensor can be “functionally similar” yet still fail emissions readiness or trigger codes. What it looks like: a replacement that fits physically but reads out of range under load. Tools/methods: scan with a tool like a Launch X431 or Autel MaxiSys, then compare live data to expected behavior from service documentation. Outcome target: no recurring P-codes after the repair.
Skip the “same plug” assumption. Signal ranges matter.
Check warranty terms like a contract
What to do: read the warranty for coverage length, exclusions, and whether labor is included. Why it works: many aftermarket warranties cover the part only, not the labor to remove and reinstall. What it looks like: a 2-year parts warranty that still leaves you paying $150–$300 in labor if the part fails after the covered window. Tools/methods: ask the shop to document the part number and warranty claim process before work starts. Outcome target: predictable out-of-pocket cost if the part fails.
Labor coverage changes the math. Read the fine print.
Compare materials and coatings, not labels
What to do: evaluate coatings and materials for corrosion-prone parts. Why it works: a zinc coating thickness or corrosion-resistant finish affects lifespan in road-salt regions. What it looks like: aftermarket exhaust hangers or brake hardware that rusts sooner, even when the metal thickness looks similar. Tools/methods: look for stated coating type, hardware grade, and whether the part is designed for salt exposure; inspect surface finish on delivery. Outcome target: fewer rework visits after winter.
Road salt punishes thin coatings.
Plan for labor time and return risk
What to do: ask the installer how long the job takes and what happens if the part doesn’t fit. Why it works: OEM parts sometimes arrive with correct revisions, while aftermarket parts can require bracket swaps or re-torque procedures. What it looks like: a shop that stocks common OEM hardware or keeps a return workflow ready. Tools/methods: get a written estimate that separates parts cost from labor and includes a fitment contingency. Outcome target: fewer delays and less downtime.
Time is money. Ask for the contingency plan.
Use real performance targets for brakes and cooling
What to do: set measurable expectations for stopping and temperature control. Why it works: “works” is vague; brake noise, pedal travel, and fade behavior show up quickly. What it looks like: a brake job that produces vibration at 60–70 mph within the first 500 miles, or a cooling system that cycles more often than before. Tools/methods: after installation, perform a controlled bedding procedure and monitor coolant temperature behavior on a scan tool. Outcome target: stable operation without recurring warnings.
Measure behavior after 500 miles.
Mini Case Examples
Case 1: A regional delivery company ran a 2.0L turbo compact van with 35,000 miles per year. They replaced a failed front wheel-speed sensor using a low-cost aftermarket option that matched the connector shape but not the exact tone-ring profile. Result: ABS and traction lights returned within 600 miles, and the sensor was replaced again with an OEM part. Total cost rose by roughly $450–$700 once you include diagnosis and labor, even though the first sensor was cheaper.
Skip the “connector-only” match. It failed fast.
Case 2: A small shop serviced a 3.5L V6 midsize SUV with a cooling fan clutch assembly that had started to overrun. They compared two aftermarket listings and chose one that matched the OEM mounting pattern and included the correct thermal control spec. Result: the fan cycling frequency returned to normal, and the coolant stayed within expected temperature bands during summer highway runs. Estimated savings: about $200–$400 versus repeated visits, based on reduced return labor over the next 15,000 miles.
Match mounting and thermal behavior. Then you stop chasing it.
Checklist for Choosing Parts
| Decision point | OEM parts | Aftermarket parts | What to verify before paying |
|---|---|---|---|
| Fitment | Often matches production revision | Varies by supplier and revision | VIN match, production date, axle/brake package |
| Electronics | Correct connector and signal intent | Can differ in signal range | Connector type, mounting, scan tool live data after install |
| Warranty | Often tied to repair program | Part-only coverage common | Labor coverage, claim process, exclusions |
| Corrosion life | Factory coating baseline | Coating thickness varies | Coating type, hardware grade, inspection on delivery |
| Total cost | Higher part price, fewer surprises | Lower part price, higher return risk | Labor time, return policy, downtime cost |
Common Mistakes and Fixes
Buying by appearance causes the first problem. People see the same shape on a listing and skip the revision details, which matters on sensors and brake hardware. Impact: recurring codes or vibration after installation. Avoid it by matching VIN and OEM number, then confirming connector and mounting style before checkout.
Skip the photo match. Use the part number.
Ignoring warranty language causes the second problem. Many aftermarket warranties cover the part but not labor, and some exclude wear-related failures. Impact: you pay again for diagnosis and reinstallation. Avoid it by asking the shop to quote labor separately and confirm whether the warranty covers labor or only the component.
Warranty without labor is a trap.
Choosing mixed brands causes the third problem. A vehicle with ABS and stability control can behave differently if one component’s tolerances drift from the rest of the system. Impact: uneven wear, noise, and warning lights. Avoid it by keeping the system consistent: for example, use the same brand family for all pads and rotors on an axle, and match sensor brand when possible.
Consistency beats patchwork.
Overlooking installation details causes the fourth problem. Torque specs, surface prep, and bedding procedures affect brake performance and sensor reliability. Impact: premature failure even when the part is correct. Avoid it by requesting the shop follow the manufacturer torque sequence and bedding steps; it rarely takes extra time, but it changes outcomes.
Torque and prep decide longevity.
FAQ
Are OEM parts always better?
OEM parts often match the vehicle’s original design intent, including revision-specific hardware and, for electronics, the expected signal behavior. That reduces fitment surprises and can lower the odds of repeat labor. Aftermarket parts can be equal in performance when they match the exact application and are engineered to the same spec, but the range is wider. If you’re replacing a wheel-speed sensor, a brake component tied to ABS, or a cooling module, OEM tends to reduce risk. For purely cosmetic trim, aftermarket choices usually matter less.
Will aftermarket parts trigger warning lights?
They can, especially for sensors and emissions-related components. A part may physically install but still report values outside the expected range, which can set a code and affect readiness monitors. The risk rises when the listing matches “year/make/model” but not the specific production revision. After installation, scan the vehicle for stored and pending codes and check live data while driving. If a warning appears within the first few drive cycles, stop guessing and diagnose with a scan tool rather than replacing more parts.
How do I confirm compatibility before buying?
Use the VIN and the OEM part number as your anchor. Then cross-check the aftermarket listing for the same application details: connector type, mounting style, axle/brake package, and any revision notes. For brake jobs, confirm rotor thickness and pad backing plate design, not just rotor diameter. For suspension parts, confirm bushing dimensions and whether the part includes the correct hardware. If the seller can’t provide application specifics, treat the listing as uncertain and ask for the exact part number match.
What warranty differences matter most?
Look for three items: warranty length, whether labor is covered, and what counts as a failure. Many aftermarket warranties cover the part only, and some exclude consequential damage or failures caused by installation errors. OEM programs can be tied to a repair invoice and may include labor depending on the shop and coverage terms. Before work starts, ask the installer to document the part number on the invoice and explain the claim process. If the warranty requires you to return the part to a specific location, factor in your downtime.
Do aftermarket brakes last as long as OEM?
Brake life depends on friction compound, rotor metallurgy, and driving pattern. Two sets can both “fit” but wear differently, and noise can vary even when stopping distance is similar. If you drive a 2.0L turbo commuter with frequent highway braking, you may see different wear than a 3.5L V6 SUV doing short trips and hills. The best approach is to compare stated friction ratings, check for hardware compatibility, and inspect rotor surface condition after the first 500–1,000 miles. If vibration appears early, address it quickly to avoid uneven wear.
Author's Insight
OEM and aftermarket parts differ most when the part interacts with electronics, safety systems, or corrosion-prone materials. Fitment issues often trace back to production revisions, not the general vehicle model. Labor cost turns small mismatches into expensive repeat visits, which is why VIN-based verification matters. For electronics, a scan tool check after installation catches problems that a visual inspection misses. When the part is safety-related, the safest path is matching the exact application and documenting the part number on the repair order.
Key Takeaways
Choose based on application match, not the label “OEM” or “aftermarket.” Use VIN and OEM part numbers for sensors, brakes, cooling components, and any part tied to ABS or stability control. Read warranty terms for labor coverage, because the part price rarely tells the full story. After installation, verify with a scan tool for electronics and inspect brake feel and noise within the first 500–1,000 miles.
If you see repeated warning lights, ABS cycling, overheating, or steering/suspension clunks, stop driving and have a professional diagnose the cause. A correct part can still fail if the underlying issue is misdiagnosed, like a wiring fault or a damaged tone ring. For safety-critical systems, prioritize accurate diagnosis over quick part swaps.