Brake Noises and Real Facts
Brake pad wear can sound like a warning, but the exact noise depends on pad material, rotor condition, and how much rust has built up. Many passenger cars use brake pads with wear indicators that create a high-pitched squeal when friction material gets thin. A common real-world threshold is roughly 3 mm of remaining pad thickness, where noise and reduced margin show up more often.
Brake systems also differ by vehicle type. A 2.0L turbo sedan that sees mostly highway miles may glaze pads and delay squeal, while a 3.5L V6 SUV used for stop-and-go commuting can trigger noise sooner. Brake noise can also change with temperature swings, wet roads, and how often you do full stops from speed.
Brake noise statistics are messy because manufacturers rarely publish “noise rate” by model, but industry testing and warranty claims show that squeal complaints are among the most frequent brake-related customer concerns. In the U.S., brake pads are typically replaced around 30,000–70,000 miles depending on driving style, vehicle weight, and rotor wear. That range is wide because a light-footed driver on flat roads can stretch pad life, while towing or mountain descents shorten it.
Skip the guesswork. Noise patterns matter because they point to different failure modes.
For example, a 2019–2023 compact crossover with a 2.5L engine may use ceramic or low-metallic pads that tend to squeal differently than semi-metallic pads. A heavy-duty pickup with a 6.6L diesel and frequent towing can generate more dust and heat, which changes how the pad surface behaves. The sound you hear is often the pad’s friction layer contacting the rotor hardware, not the caliper “failing” outright.
Why People Misread Brake Sound
Drivers often assume any brake noise means “pads are gone,” then they wait until the sound turns into grinding. That delay matters because grinding usually indicates metal-to-metal contact or a worn pad backing plate contacting the rotor. Once the rotor surface is damaged, pad replacement alone may not restore smooth braking.
Another common mistake is chasing the noise without checking the context. A short squeak after rain can be normal pad surface moisture and rotor rust, especially on cars that sit. A persistent squeal during every stop from 20–40 mph is a different story, because it suggests the wear indicator is contacting the rotor.
Consequences show up in both safety and cost. If you keep driving with worn pads, you can score the rotor, which often forces rotor replacement. Rotor replacement costs vary by region and vehicle, but it’s common for a brake job to rise from a pad-only repair to a pad-and-rotor job once the rotor has grooves or thickness loss.
Real-world situations make it obvious. A rideshare driver in a city with frequent hard stops may hear squeal daily, then notice longer stopping distances after a rotor gets uneven. A family SUV on a road trip can start with mild squeaks, then develop vibration when braking because the rotor got overheated and warped slightly.
Skip the “it’ll go away” plan. Noise that worsens over 2–3 weeks usually means friction material is still changing.
Vehicle type changes the pattern. Rear brakes on many cars do less work in normal driving, so rear pad wear can be quieter until it reaches a point where the wear indicator triggers. Conversely, front brakes on a 3.0L V6 sedan used for mountain commuting can wear faster, and the noise may be louder because the front axle does most of the braking.
Fixing Brake Noise with Checks
Identify squeal vs grinding
Do this: note whether the sound is a high-pitched squeal, a low growl, or a grinding scrape. Squeal that appears near the end of braking travel often aligns with pad wear indicators. Grinding usually means the pad friction material is gone and metal is contacting the rotor.
Why it works: wear indicators are designed to contact the rotor at a specific remaining thickness, so the sound correlates with pad wear. Grinding correlates with rotor damage risk because the rotor surface is being scored.
What it looks like: squeal often starts around 20–30 mph and fades after a few stops, while grinding tends to be constant and louder as you brake harder.
Tools/methods: use a phone video while braking in a safe, controlled area. A quick recording helps you compare “day 1” to “day 10,” which matters when deciding urgency.
Numbers/outcomes: if you hear grinding, plan on inspection the same day. If it’s squeal only, you can often schedule service within days, but don’t stretch it indefinitely.
Check pad thickness safely
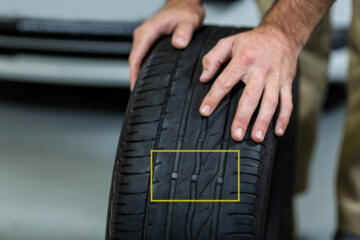
Do this: inspect through the wheel spokes or remove the wheel if you can. Many cars allow a visual estimate, but the most reliable check measures pad thickness with a caliper or a brake gauge.
Why it works: pad thickness directly predicts remaining life. A typical “replace soon” range is around 3 mm, with less margin for rotors that are already worn.
What it looks like: you’ll see uneven wear if one pad is sticking in the caliper. Uneven wear can create a different noise pattern, sometimes a rhythmic squeak.
Tools/methods: a $10–$25 brake pad gauge or a caliper works. If you see heavy rust on the rotor edge, the noise may be partly surface-related.
Numbers/outcomes: if you measure under 3 mm on the axle that makes the noise, plan replacement. If you measure 6–8 mm and still hear squeal, the issue may be pad type, glazing, or rotor surface condition.
Inspect rotors for scoring
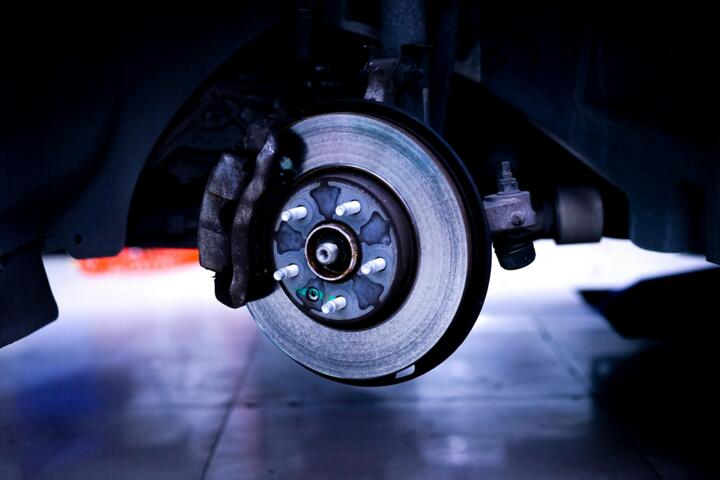
Do this: look for grooves, deep scoring lines, or a blue heat tint on the rotor. If the rotor has grooves you can feel with a fingernail, pads may not seat correctly.
Why it works: rotor damage changes how the pad friction layer mates to the rotor. That mismatch can keep noise going even after new pads.
What it looks like: vibration during braking often points to rotor thickness variation or uneven wear, not just pad wear.
Tools/methods: a straightedge and feeler gauge can help check warping, but a mechanic’s rotor micrometer gives the real thickness variation numbers. If you have a service shop, ask for rotor measurements.
Numbers/outcomes: rotor thickness specs vary by model, but if the rotor is near minimum thickness, replacement becomes the safer path. If thickness is within spec and the surface is only lightly glazed, resurfacing may be possible on some vehicles, though many modern rotors are not designed for it.
Match noise to driving pattern
Do this: connect the noise to when it happens—first stop after startup, after rain, or during repeated braking. Pad glazing from light braking can cause squeal until the pad surface “cleans” with harder stops.
Why it works: friction material behaves differently when it’s overheated, wet, or glazed. A 2.0L turbo commuter that rarely brakes hard can develop a different pad surface than a 3.5L V6 SUV that brakes often.
What it looks like: squeal only on the first stop in the morning often points to surface rust and moisture, not worn pads.
Tools/methods: keep a simple log for 7 days: date, speed range, weather, and whether the noise happens after a long drive or short trips. I’ve seen this help more than chasing parts because it narrows the cause quickly.
Numbers/outcomes: if the noise appears after 10–20 minutes of driving and disappears after several stops, it may be surface-related. If it steadily worsens over 2–3 weeks, schedule inspection.
Use the right pad material
Do this: match replacement pads to the vehicle’s brake system design and your use case. Ceramic pads often run quieter but can cost more, while semi-metallic pads can handle heat better in some applications.
Why it works: pad compound affects friction coefficient stability, noise tendency, and dust. Heat management matters on a 6.6L diesel pickup used for towing, where repeated descents can cook the rotor surface.
What it looks like: after replacement, some pads bed in with a specific pattern; noise can be worse before the friction layer transfers properly.
Tools/methods: follow the pad manufacturer’s bedding guidance included in the box. Shops also use bedding procedures, but the exact steps vary by compound.
Numbers/outcomes: bedding typically takes a few dozen stops. If noise is still severe after bedding, inspect caliper slide pins and rotor condition.
Check caliper slides and hardware
Do this: inspect caliper slide pins for corrosion and uneven pad wear. A sticking caliper can cause one pad to wear faster, creating noise and uneven braking feel.
Why it works: brake noise isn’t always “pad wear.” Mechanical drag changes pad temperature and contact pressure, which changes how the pad squeals.
What it looks like: one pad significantly thinner than the other on the same axle, plus a squeal that comes from one wheel.
Tools/methods: a mechanic’s inspection includes checking boot condition and measuring pad taper. If you DIY, don’t remove hardware without understanding torque specs.
Numbers/outcomes: if you find uneven wear, plan on cleaning and lubricating slides with the correct high-temperature brake grease. Skipping this step can bring the noise back quickly.
Bed-in and verify after service
Do this: after pad replacement, verify the noise is gone and braking feel is consistent. A short test drive should include light stops and a few moderate stops from safe speeds.
Why it works: bedding transfers pad material to the rotor and stabilizes friction. If the bedding is rushed, you can get persistent squeal or uneven transfer.
What it looks like: mild dusting is normal; persistent squeal under light braking suggests glazing or a hardware issue.
Tools/methods: check wheel dust color and inspect for uneven pad contact after 100–200 miles. I keep a note of mileage because it’s easy to forget when the noise started again.
Numbers/outcomes: if the noise returns within 500 miles, it often points to rotor surface issues, caliper slide problems, or wrong pad fit.
Mini Cases: What Changed
Fleet sedan with repeat squeal
A delivery fleet ran a 2.0L turbo sedan with frequent stop-and-go routes. The driver reported a high-pitched squeal at 25–35 mph for about 3 weeks, then vibration on braking. The shop measured pad thickness at about 2 mm on the front axle and found rotor grooves.
What they did: they replaced pads and rotors on the front axle and cleaned and lubricated caliper slides. They also checked rotor thickness variation with a micrometer and confirmed it was out of spec.
Result: the squeal stopped after bedding, and vibration disappeared. The repair moved from an estimated pad-only cost to a pad-and-rotor job; the total was roughly $650–$900 depending on parts and labor rates, which is consistent with many U.S. shops for front axle replacement.
Family SUV with rain-time squeaks
A family SUV with a 3.5L V6 engine saw intermittent squeaks after rain and after long parking. The sound lasted only the first few stops and then faded. A visual inspection showed pad thickness around 6 mm, with light rotor surface rust at the outer edge.
What they did: the owner scheduled a brake inspection rather than immediate replacement. The shop cleaned the rotor surface, checked pad seating, and verified slide hardware movement.
Result: the squeaks reduced significantly after the next wet cycle. The cost stayed near an inspection and cleaning, roughly $120–$250, and the pads were replaced later when thickness dropped closer to 3 mm.
Brake Noise Checklist
| Noise you hear | Most likely cause | What to check next | How urgent |
|---|---|---|---|
| High-pitched squeal | Wear indicator contact or glazing | Pad thickness (target ~3 mm), rotor surface | Schedule within days |
| Grinding scrape | Metal-to-metal contact | Rotor scoring, pad backing plate wear | Inspect immediately |
| Intermittent squeak after rain | Surface rust and moisture | Pad thickness, rotor edge rust | Monitor, then inspect |
| Growl + vibration | Rotor thickness variation or uneven wear | Rotor micrometer measurements | Book service soon |
Common Mistakes and Fixes
Ignoring when the noise starts
Why it happens: people listen only during hard braking, then miss that the sound appears on the first stop after startup. That pattern often points to surface rust or pad glazing rather than immediate pad failure.
Impact: you can replace pads too early, or you can miss a rotor issue that shows up only after repeated stops.
How to avoid it: record the speed range and whether the noise happens after rain, after sitting, or after 10–15 minutes of driving. A short log beats memory.
Waiting for grinding to confirm
Why it happens: grinding feels like “proof,” so drivers keep driving until it becomes obvious. The problem is that metal-to-metal contact can score rotors quickly.
Impact: you pay for rotors you could have avoided by inspecting earlier. It also increases the chance of vibration and uneven braking feel.
How to avoid it: treat persistent squeal as a “schedule inspection” signal. If the sound is constant and loud, measure pad thickness.
Replacing pads without checking rotors
Why it happens: pad replacement is simpler, so it becomes the default plan. Rotors can be heat-spotted or grooved, and new pads can still squeal.
Impact: the noise returns, and the second repair costs more. Shops also spend extra time diagnosing because the root cause wasn’t addressed.
How to avoid it: ask for rotor condition notes and thickness measurements. If the rotor has deep grooves, plan on rotor replacement.
Skipping caliper slide inspection
Why it happens: many brake jobs focus on pads and rotors only. A sticking caliper slide can cause one pad to wear faster, which changes noise and braking balance.
Impact: uneven wear shortens pad life and can lead to pulling under braking.
How to avoid it: check for uneven pad thickness on the same axle. If one side is much thinner, inspect slide hardware and boots.
Using the wrong pad type
Why it happens: buyers match parts by appearance or price, not by compound and fitment. Some pad materials are louder in certain temperatures or after glazing.
Impact: noise can persist even with correct thickness, and dust levels can rise.
How to avoid it: confirm the pad part number matches the vehicle’s brake system and your use case. If you tow with a 6.6L diesel, heat tolerance matters more than quietness.
Rushing bedding after replacement
Why it happens: drivers want to “get back to normal” immediately. Bedding needs repeated moderate stops to transfer the friction layer.
Impact: glazing can keep squeal going and reduce braking consistency.
How to avoid it: follow the bedding procedure in the pad instructions. Avoid long high-speed coasts without braking during the first few dozen stops.
FAQ
Is brake squeal always pad wear?
Not always. A brief squeak after rain or after the car sits can come from surface rust on the rotor and moisture on the pad face. Wear-indicator squeal tends to be higher pitched and repeat at similar points in the braking cycle, often as pad thickness approaches the low single-millimeter range. Grinding is different: it usually indicates metal-to-metal contact and rotor scoring risk. If the noise is persistent across dry and wet conditions, inspect pad thickness and rotor condition.
How many miles can I drive with squealing pads?
There’s no safe universal number because pad thickness, rotor condition, and driving style vary. A practical approach is to measure pad thickness. If you’re near about 3 mm remaining, schedule replacement soon; if you’re under that, treat it as urgent. If you hear grinding or feel vibration, stop driving and inspect immediately. For a commuter car, a shop inspection within a few days is a reasonable next step when squeal is consistent.
Why does my brake noise change after rain?
Moisture and rust form a thin film on the rotor surface. When you brake, the pad friction layer scrapes that film off, which can create a squeak that fades after a few stops. This pattern is common on vehicles that see short trips or park outdoors. If the noise continues for every stop after the rotors warm up, pad wear indicators or glazing become more likely. Inspecting pad thickness through the wheel spokes can separate “surface rust” from “thin pads.”
Can worn rotors cause brake squeal?
Yes. Rotors with grooves, heat spots, or uneven surface transfer can make new pads squeal or produce a growl. Even when pad thickness is adequate, a rotor that has thickness variation can create vibration that changes the sound. A mechanic can measure rotor thickness variation with a micrometer and check for scoring. If the rotor surface is badly grooved, replacing rotors along with pads often stops the noise more reliably than pads alone.
Do ceramic pads always sound quieter?
Ceramic pads often run quieter in many conditions, but they do not guarantee silence. Noise can still occur from glazing, rotor surface condition, or hardware issues like sticking caliper slides. Ceramic compounds can also squeal when they’re cold or when the pad face hasn’t been bedded properly. If you replace pads and the squeal returns within a few hundred miles, inspect rotor condition and caliper slide hardware. Confirm the pad part number matches the vehicle’s brake system.
Author's Insight
Brake noise is a symptom, not a diagnosis. Squeal often tracks pad wear indicators or glazing, while grinding tracks metal-to-metal contact and rotor damage risk. The same pad can sound different on a 2.5L crossover used for short trips versus a 6.6L diesel pickup used for towing because heat cycles and dust levels change friction behavior.
When a noise pattern repeats at the same speeds and braking effort, inspection beats guessing. A quick pad thickness check and a rotor surface look through the wheel are usually more informative than listening alone. If vibration joins the noise, rotor measurements matter more than pad thickness.
Skip the parts cannon. Start with the axle and wheel that make the sound, then verify pad thickness and rotor condition before ordering anything.
Key Takeaways
High-pitched squeal usually points to wear indicators or glazing, while grinding points to metal contact and rotor scoring risk. Persistent squeal that worsens over weeks deserves pad thickness measurement and rotor inspection, not just “more driving.” If you feel vibration or see rotor grooves, plan for a more involved repair than pads alone.
Next steps: check pad thickness through the wheel, note whether the noise happens after rain or after sitting, and record when it occurs. If you measure near 3 mm remaining or hear grinding, schedule service quickly. If the brake pedal feels abnormal, the car pulls under braking, or the noise is loud and constant, stop driving and get professional inspection.
Limits: sound alone cannot confirm rotor thickness variation or caliper slide sticking. Professional measurement and inspection are needed when vibration, uneven wear, or repeated noise after new pads shows up.